零资源运行大模型:Hugging Face API + LiteLLM + Flask
前言
HuggingFace 是自然语言处理领域的开源软件库和平台,其收纳了众多最前沿的模型和数据集,并提供了 Serverless Inference API,用户可以轻松调用这些模型,甚至用于运行自己的私人模型。本教程将指导用户如何利用 Hugging Face API 零资源运行这些模型,并结合 LiteLLM 和 Flask 简化调用逻辑,以适配 OpenAI。
教程概要
- 介绍 Hugging Face Serverless API 的使用方法,包括如何调用嵌入模型、文本生成模型和对话模型。
- 通过 LiteLLM 转换 Hugging Face 模型为 OpenAI 格式。
- 使用 Flask 创建一个接口,转发请求并实现自定义逻辑。
Hugging Face
Ref: Hugging Face API Inference
简介
Hugging Face 的 Serverless Inference API 让用户通过简单的 HTTP 请求即可免费测试和评估超过 15 万个公开的机器学习模型,以及使用自己的私人模型。推理由 Hugging Face 提供的共享基础设施加速。
- 免费使用:推理 API 免费提供使用,并且有速率限制。需要用于生产环境的推理解决方案,可使用 Inference Endpoints 服务。
- 主要特点:
- 支持超过 15 万个 Transformers、Diffusers 或 Timm 模型。
- 内置集成 20 多个开源库,如 spaCy、SpeechBrain、Keras 等。
- 模型切换方便,通过切换模型 ID 即可。
- 支持多种任务,如分类、图像分割、语音识别、对话、摘要、翻译、问答、嵌入提取等。
- 基于 Intel Xeon Ice Lake 提供加速推理。
用户可通过 Inference Endpoint 标签 筛选支持的 HF Inference 的模型。
文生图模型
示例模型:stable-diffusion-xl-base-1.0
调用方式:
1 | prompt="Imagine a delightful scene found in a children'\''s book. There'\''s a playful puppy with its adorable features exaggerated in classic cartoon style. Its fur is a soft golden color, with a pair of sparkling eyes full of curiosity. Its tail, bushy and wagging, is an embodiment of its joyful nature. The puppy is in a typical playful stance, a chew toy in its mouth and its tongue hanging out. The scene is set in a homely backyard with green grass and plenty colorful flowers, and a bright sun up in the sky, resulting in a warm, inviting atmosphere." |
返回二进制图片数据,输出到指定文件。
输出效果:

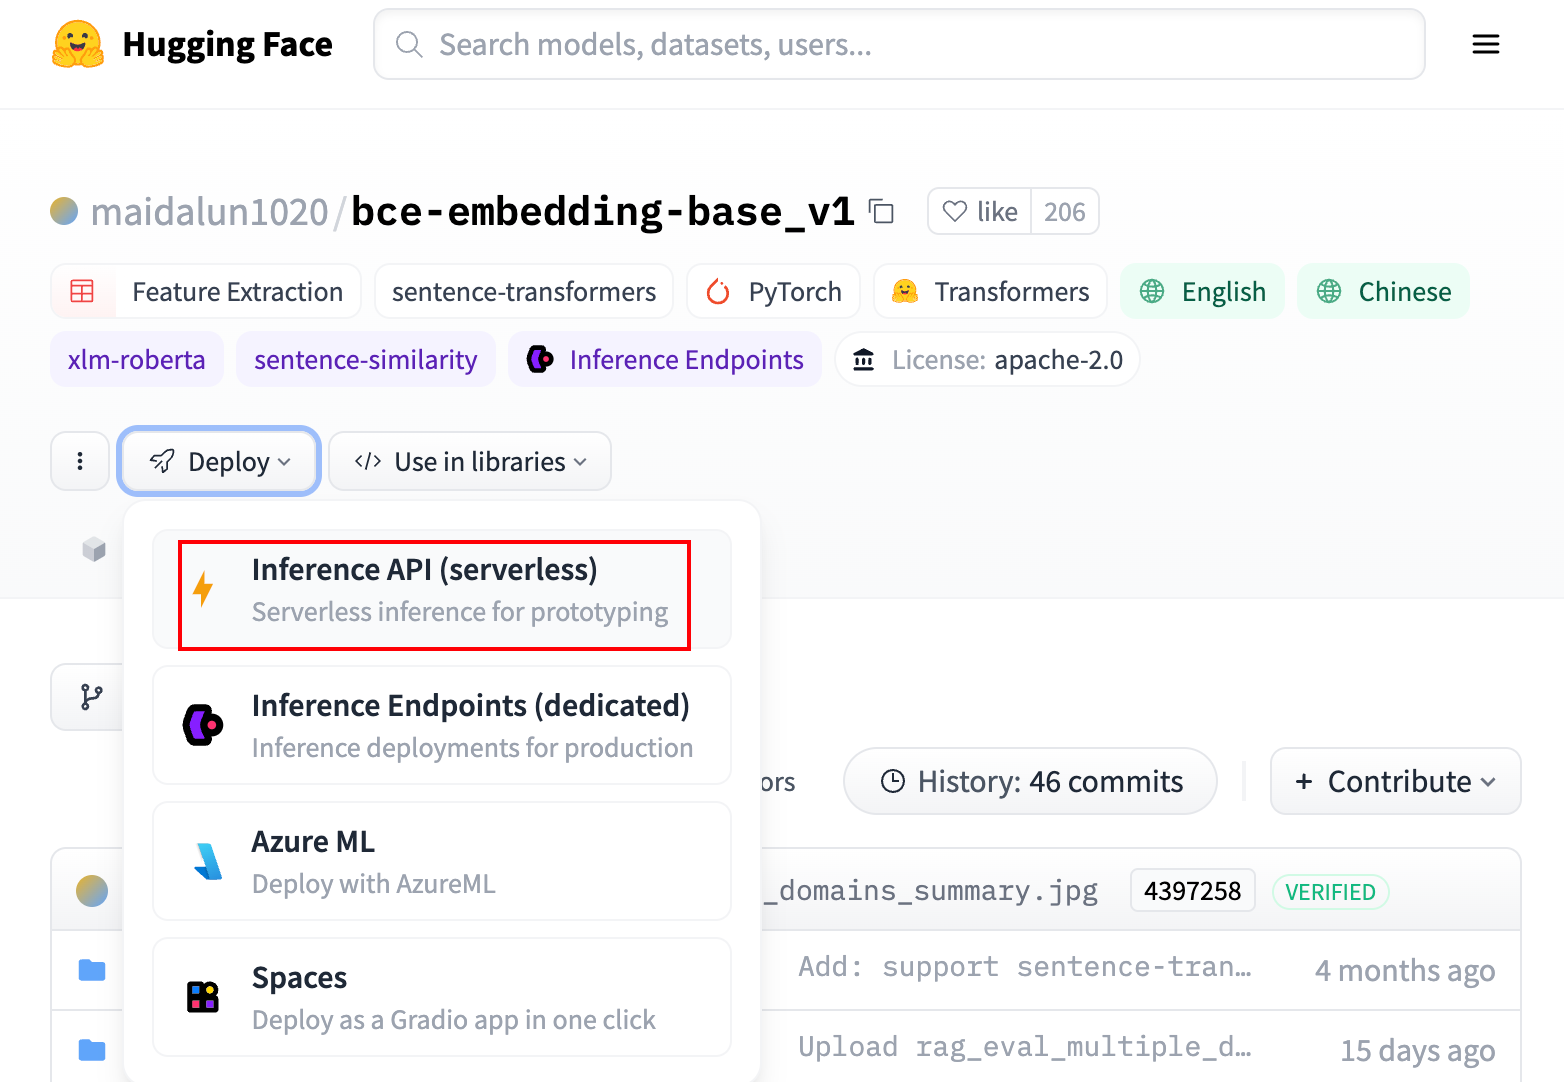
嵌入模型
以网易有道推出的 BCEmbedding 模型为例,先找到 Hugging Face 的地址:
调用方法:
1 | curl https://api-inference.huggingface.co/models/maidalun1020/bce-embedding-base_v1 \ |
返回结果:
1 | [-0.0015705720288679004,0.008027488365769386,...] |
还可用列表形式调用:
1 | curl https://api-inference.huggingface.co/models/maidalun1020/bce-embedding-base_v1 \ |
文本生成模型
以 MetaAI 的 Llama3 为例:
调用方式:
1 | curl https://api-inference.huggingface.co/models/meta-llama/Meta-Llama-3-8B-Instruct \ |
返回结果:
1 | [{"generated_text":"hello! i am a junior high school student, and i am really interested in history..."}] |
LiteLLM
简介
LiteLLM 项目 为主流的模型服务提供统一的调用方式。功能包括:
- 标准化接口:调用超过 100 种 LLM 模型,提供统一的输入/输出格式。
- 接口转换:支持将输入翻译成提供商的文本生成、嵌入和图像生成端点。
- 多部署重试/后备机制:可以在多个部署(如 Azure/OpenAI)之间重试或切换。
- 预算和速率限制:可为项目、API 密钥或模型设置预算和速率限制。
- 跟踪开销:可监控项目花费,并设置预算限制。
安装
通过 pip 安装:
1 | pip install litellm |
如果希望将 LiteLLM 服务部署成类似 OneAPI 的形式,并带有 UI 管理界面,则用以下方式进行安装:
1 | git clone https://github.com/BerriAI/litellm.git |
启动服务:
1 | litellm |
可参阅完整的参数文档:CLI Arguments
配置文件
为 litellm 添加下游模型并设置转发规则,参考文档:
配置文件中有五个主要设置:
| 参数名 | 描述 |
|---|---|
model_list |
服务器上支持的模型列表及其特定配置 |
router_settings |
LiteLLM 路由设置,如 routing_strategy="least-busy" |
litellm_settings |
LiteLLM 模块设置,如 litellm.drop_params=True、litellm.set_verbose=True、litellm.api_base |
general_settings |
服务器设置,如 master_key: sk-my_special_key |
environment_variables |
环境变量,如 REDIS_HOST、REDIS_PORT |
项目仓库下的 proxy_server_config.yaml 提供了完整的示例配置文件。以下示例用于配置 Hugging Face 模型:
1 | model_list: |
参数说明:
master_key作为调用的密钥,也作为管理员的登录密码store_model_in_db保存在线的模型修改database_urlUI 界面的管理需要数据库支持
Docker 配置
如果希望避免手动配置 Python 环境和数据库,官方提供了 Docker 部署方式。文档:Docker 部署。
以下是个人经过调整并验证有效的 docker-compose.yaml:
1 | version: "3.9" |
.env 文件的内容:
1 | # Postgres 配置 |
Flask
简介
HuggingFace 的文生图接口返回的是二进制图片数据,我们可以使用 Flask 结合 Nginx 代理,将结果以链接形式返回。
下面的代码段展示了如何实现这个功能,将数据保存在 /storage/dalle3/ 目录下,并通过 CDN 链接返回。
1 | from flask import Flask, request, jsonify |
将文件保存为 dalle3.py 并启动模型:
1 | # pip install gunicorn |
接着我们可以通过 Nginx 配置返回的 CDN 链接,如下所示:
1 | server { |
最后,通过 OpenAI 接口的方式调用:
1 | curl https://cdn.example.com/v1/images/generations \ |
以上,通过 Hugging Face、LiteLLM 和 Flask 来创建一个自定义接口,用于转发并处理各种模型的请求。
 wechat
 alipay